

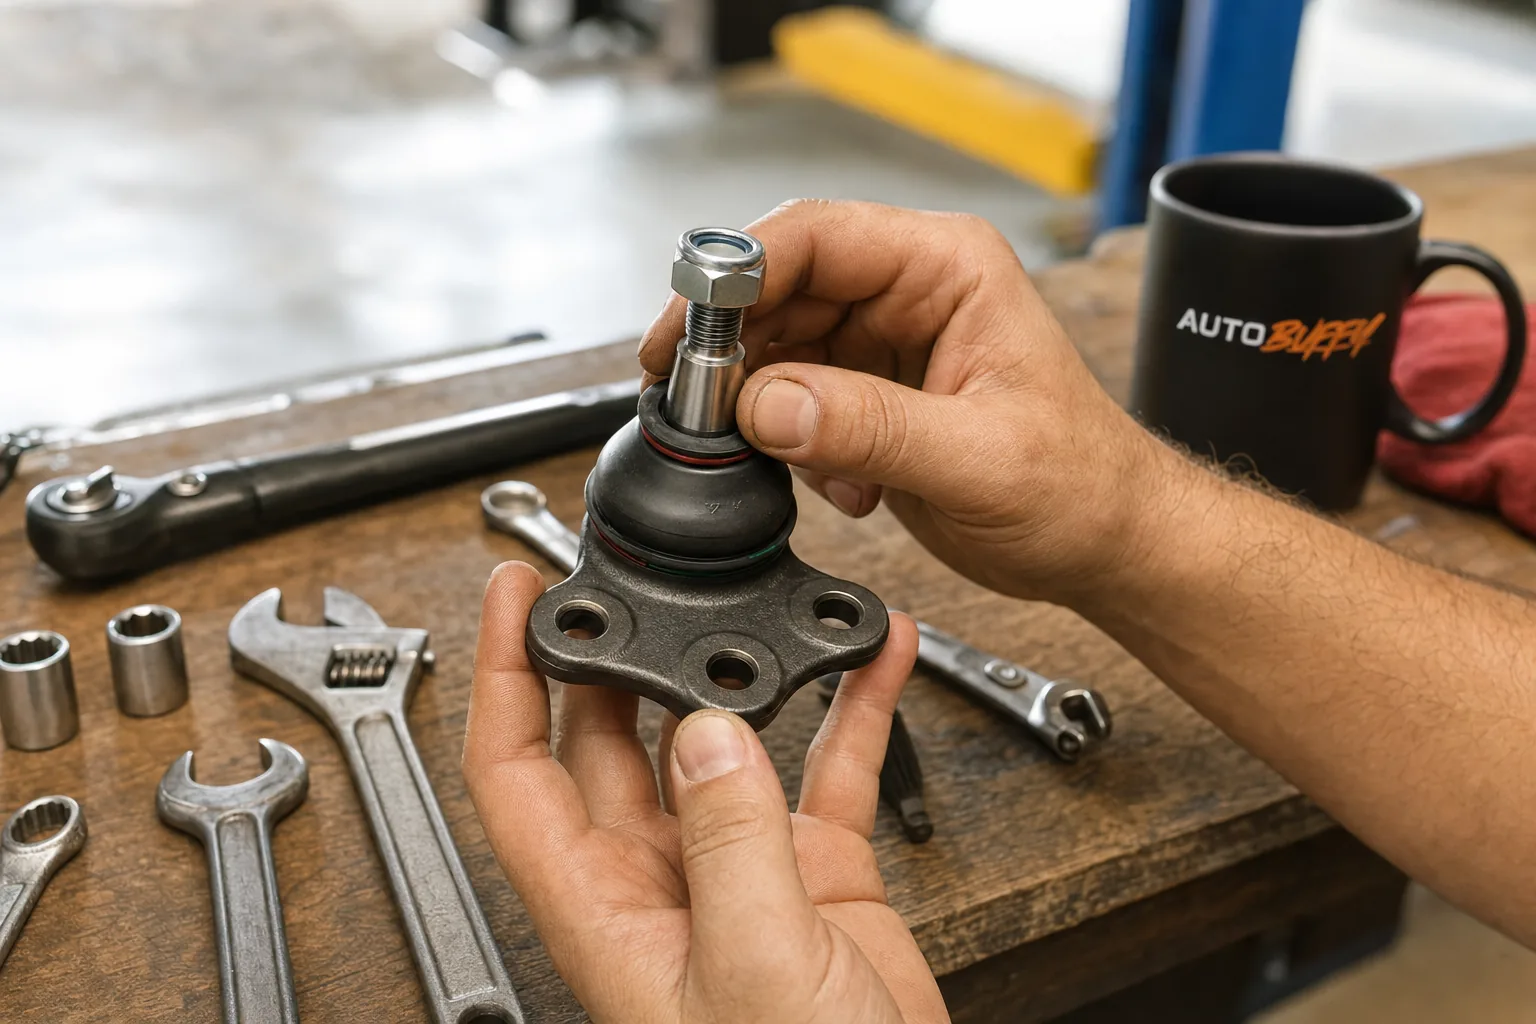
How to Check Ball Joints at Home (Pry-Bar + Wiggle Test)
Learn the pry-bar test, the wiggle test, and what to look for so you can diagnose worn ball joints before they become a safety crisis.
The Short Answer
A bad ball joint will show measurable vertical or horizontal play when you pry-test the unloaded joint — any visible movement beyond your vehicle's service limit (often 0.050" or less) means replacement is due.
| Test Method | What It Checks | Suspension Condition | Conclusive Alone? |
|---|---|---|---|
| Pry-bar test | Vertical play (load-carrying lower joint) | Unloaded (wheel hanging) | Yes, most reliable |
| 12 & 6 wiggle | Vertical play at tire | Unloaded | No — can mimic bearing play |
| 3 & 9 wiggle | Horizontal play (upper joint / tie rods) | Unloaded | Partial — also checks tie rods |
| Visual / grease boot | Boot cracking, grease leak, corrosion | Either | No — confirms wear, not play |
| Clunk/noise test | Audible looseness over bumps | Loaded (driving) | No — confirms something's loose |
Combine at least two of these. One test alone can mislead you. ---
What Ball Joints Actually Do (and Why They Fail)
Ball joints are the pivot points connecting your control arms to the steering knuckle. Every time you hit a bump, turn the wheel, or brake hard, that joint takes the load. Most are grease-packed from the factory with a rubber boot keeping contamination out. Once that boot cracks — road grit, water, and brake dust get in — wear accelerates fast. High-mileage vehicles (100k+), lifted trucks with altered geometry, and cars that see harsh winters with salt-covered roads tend to eat ball joints faster than average. But age alone can kill the boot on a low-mileage garage queen, too. ---
Tools You'll Need Before You Start
- Floor jack and rated jack stands — no exceptions
- 18–24 inch pry bar
- Bright flashlight or work light
- A helper (seriously useful)
- Vehicle service manual or a reliable online spec source for your exact play tolerance
- Optional: dial indicator for a precise measurement
Do not attempt this on a scissor jack or a single hydraulic jack with no stands. Ball joint inspection means getting under or closely beside the wheel — a dropped car is a life-altering event. ---
How to Do the Pry-Bar Test (Most Reliable Method)
This is the definitive check for a load-carrying lower ball joint, which is the most common type on front suspensions. ### Step 1 — Unload the Suspension
Jack the vehicle under the frame or a solid chassis point (not the control arm). Let the wheel hang freely. Place jack stands under the frame before you go under the car. > MacPherson strut note: If your vehicle has MacPherson struts, the lower ball joint design may actually require the suspension to be *loaded* to reveal play — meaning the jack goes under the lower control arm, not the frame. Check your service manual for your specific setup before assuming "wheel hanging" is correct. ### Step 2 — Position the Pry Bar
Slide a long pry bar between the lower control arm and the steering knuckle, placing it as close to the ball joint housing as you can. This is the correct placement — not under the tire, not under the knuckle alone. ### Step 3 — Apply Leverage and Watch
With your helper watching the joint (or with your flashlight aimed at it), apply upward leverage on the pry bar. You're looking for visible vertical movement between the ball stud and the housing. - No visible movement: Joint is likely fine. Note the mileage and recheck at your next service. - Slight movement with a firm feel: Check against your spec. Some play is designed in; your manual will tell you the limit. - Obvious, sloppy movement — or a clunk you can feel: Replace it. Don't wait. ---
The Wiggle Tests: Useful, but Know Their Limits
12 & 6 O'Clock (Vertical Wiggle)
Grab the tire at top and bottom. Rock it in and out. Play here can point to a worn lower ball joint — but it can also indicate wheel bearing play on some vehicles. This is why the 12 & 6 test must never be your only data point. If you feel movement, follow up with the pry-bar test to isolate where it's coming from. ### 3 & 9 O'Clock (Horizontal Wiggle)
Grab the tire at 3 and 9. Rock side to side. Play here usually points to the upper ball joint or the tie rod ends rather than the lower joint. If you feel it, inspect both — they live in the same neighborhood and often wear together. ---
Visual Inspection: The Quick Sanity Check
Before you even get a pry bar out, do a visual pass with a flashlight:
- Torn or cracked grease boot: Once the boot is gone, the joint is living on borrowed time. Even if it passes the pry test today, replacement is smart. - Grease around the joint housing: Means the boot has already failed and the grease is being flung out under load. - Rust streaking from the joint: Common on northern vehicles. Surface rust on the control arm is normal; rust weeping from the joint itself is not. - Stud angle looks off: On a loaded suspension, if the ball stud looks cocked at an odd angle relative to the housing, the joint may be worn beyond its travel limits. ---
Noise Diagnosis: What You're Hearing
Ball joint clunks have a specific character. They usually happen:
- Over sharp bumps or dips at lower speeds
- During slow parking-lot turns (load shifts onto the joint)
- On initial acceleration from a stop if the joints are severely worn
A clunk that's more rhythmic and speed-dependent is more likely a wheel bearing or CV axle. A clunk that follows steering input points to tie rods or upper joints. Ball joint noise tends to be random, thud-like, and proportional to bump severity — not tied to vehicle speed. ---
When to Replace vs. Monitor
Replace now if:
- Visible play on the pry-bar test
- Torn or missing grease boot (even with passing play today)
- Clunking that's getting progressively worse
- Tire wearing unevenly on one edge (alignment won't fix a bad joint)
Monitor at next service if:
- No play, boot is intact, but you're over 80k miles with original joints
- You hear an occasional creak (could be a dry bushing, not the joint)
My honest opinion: if you're over 100k miles and replacing one ball joint anyway, the labor savings from doing both sides at once — especially on the same axle — almost always outweigh the cost of the second part. The data backs this up: front lower ball joints on most vehicles share the same wear curve, and the labor to access them is the expensive part, not the hardware. ---
What to Buy When It's Time
For most passenger cars and light trucks, you're choosing between individual ball joints (pressed or bolted into an existing control arm) and control arm + ball joint assemblies (which include the arm, joint, and often bushings pre-installed). Assemblies cost more upfront but eliminate the need for a press and give you fresh bushings at the same time — worthwhile if your arms are high-mileage. MOOG® is a well-established name in this space — worth knowing that the MOOG® automotive parts brand (under Tenneco/DRiV) is completely separate from Moog Inc., the aerospace company. Same name, totally different businesses. Mevotech is another solid option, a Canadian specialist founded in 1982 and a four-time Gold honoree among Canada's Best Managed Companies. Both brands offer kits that bundle control arms and ball joints together, which can make sense for fleet work or a full front-end refresh. Use the part finder below to check exact fitment and current pricing for your vehicle.
Why buy from AutoBuffy
- Fitment check: add your vehicle and we confirm the part fits before you buy. If it doesn't fit because of our listing, you get a free return and a full refund, including original shipping.
- 24-month limited warranty on new parts bought on autobuffy.com.
- Real reviews: rated 4.9 by 19,069 verified customers.
- 30-day returns on unused parts in the original packaging.
- Free shipping on orders $50+. Orders placed before 12:00 PM ET (Mon-Fri) ship the same business day.
- Questions about an order? Call 888-477-2530 or email help@autobuffy.com.
Find the right ball joint for your vehicle
Guaranteed fit, ships free
FAQ / People Also Ask
The most reliable signs are clunking or popping noises over bumps, vague or wandering steering, uneven tire wear on the inner or outer edge, and visible play when you pry-test the joint with the suspension unloaded. Any one symptom warrants a proper inspection; all of them together means replace soon.
Keep Reading
Peterbilt 379 Shocks Guide: Front, Rear, Cab & Steer Axle — What to Buy and Why
7
Drag Link: What It Does and When to Replace It on Super Duty, Ram and GM HD Trucks
7
Comments
Loading comments...
Comments are moderated by the AutoBuffy team.