

How to Replace a Wheel Bearing (DIY Guide)
A failing wheel bearing can go from a faint hum to a dangerous wobble fast. Here's how to replace one yourself, with real cost ranges and step-by-step guidance.
The Short Answer
Replacing a bolt-on wheel hub assembly is a solid DIY job you can finish in 1–2 hours per wheel with common hand tools; a press-fit wheel bearing is a harder job that really needs a hydraulic press.
Here's a quick look at what you're dealing with before you pull out the socket set:
| Factor | Bolt-On Hub Assembly | Press-Fit Bearing |
|---|---|---|
| DIY Difficulty | Moderate | Advanced |
| Typical Time (per wheel) | 1–2 hours | 3–4 hours |
| Special Tools Needed | Torque wrench, breaker bar | Bearing press, snap-ring pliers, hub puller |
| Part Cost (typical range) | $80–$250 | $40–$120 |
| Total Shop Cost (parts + labor) | $250–$550 | $300–$650 |
| Alignment Needed After? | Often (front axle) | Often (front axle) |
How Do You Know Your Wheel Bearing Actually Needs Replacing?
Don't start tearing into your suspension before you confirm the diagnosis. A bad wheel bearing almost always makes noise — a low grinding or humming that rises and falls with vehicle speed. The classic test: at 50–60 mph, gently sway the steering wheel left and right. If the noise gets louder when you load one side, the bearing on that side is suspect.
Other signs to watch for:
- Steering wheel vibration that wasn't there before
- ABS or traction control warning light (the wheel speed sensor is often built into the hub)
- Visible play when you grab the wheel at 12 and 6 o'clock and rock it
- Uneven or feathered tire wear on one side
RepairPal notes that bearing noise is one of the more commonly misdiagnosed symptoms — road noise and worn tires can sound similar. If the noise doesn't track with the steering-sway test, rule out tires first.
"A worn wheel bearing that's allowed to run until it seizes can cause the wheel to separate from the vehicle — that's not a 'fix it when convenient' situation."
What's the Difference Between a Wheel Bearing and a Hub Assembly?
This trips people up, so let's clear it up fast.
A wheel bearing is the internal component — a set of steel balls or tapered rollers held in a race — that lets the wheel spin freely around the spindle. On older vehicles and many trucks, this bearing is pressed into the knuckle and can be replaced separately.
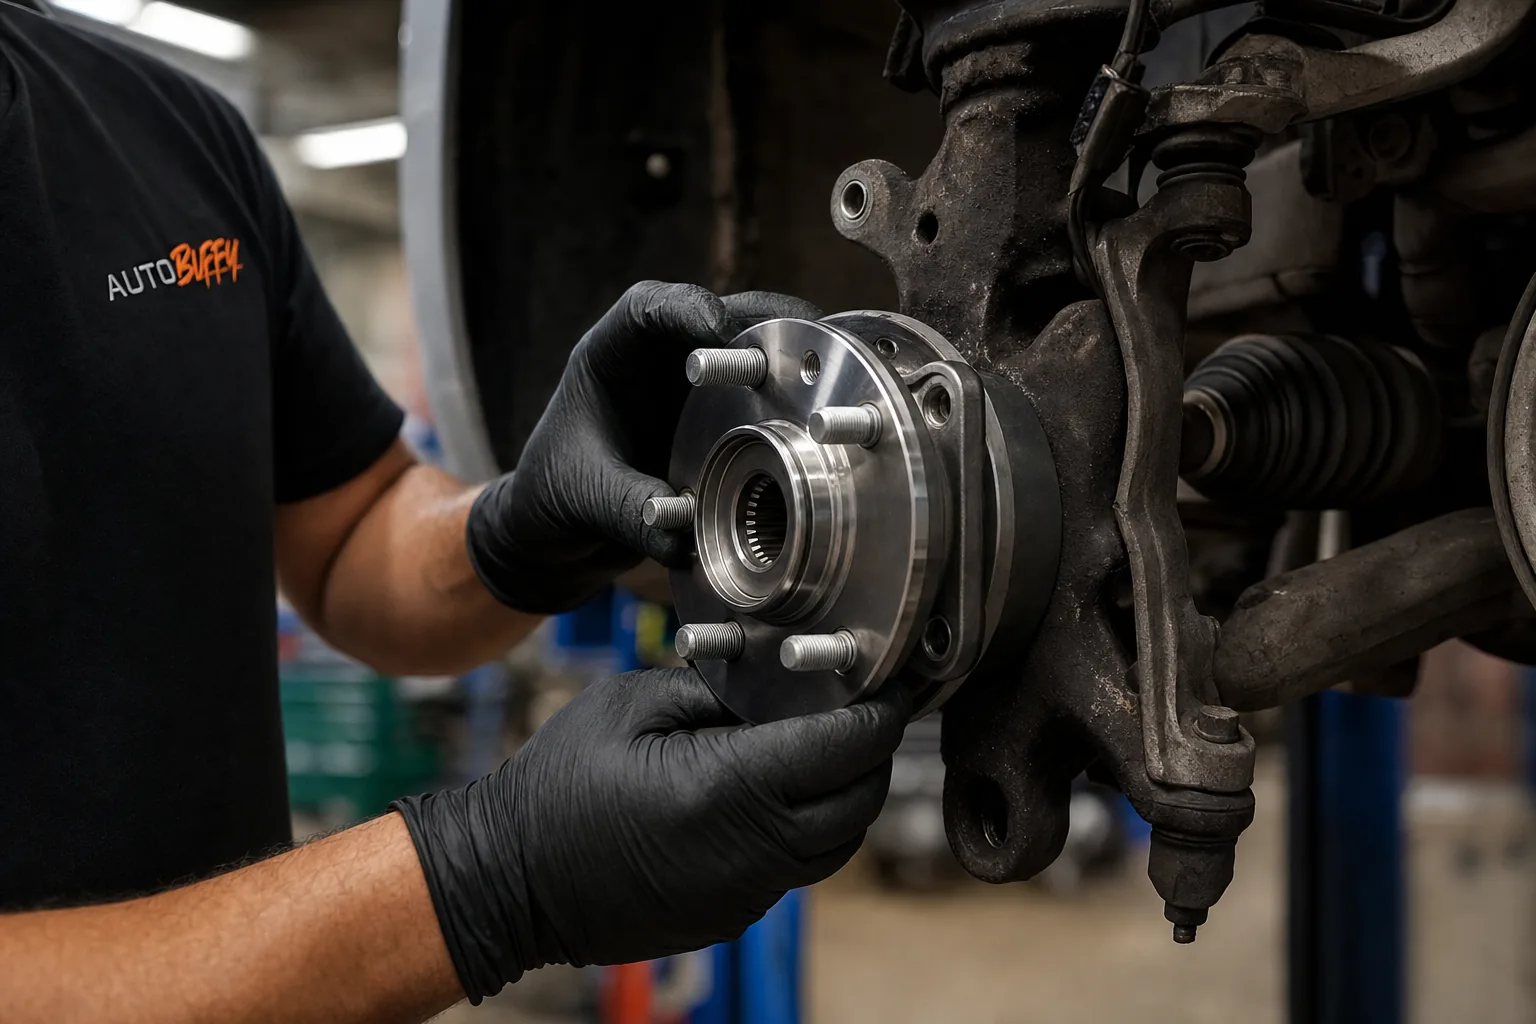
A hub assembly (also called a wheel bearing hub assembly or hub unit) is a pre-packaged unit that combines the bearing, hub flange, and wheel speed sensor into one sealed unit. You bolt it in, you're done. No press required.
Most passenger cars built in the last 20 years use the hub assembly design. If you're not sure which type your vehicle has, the part finder below will tell you the moment you enter your year, make, and model.
Tools You'll Need Before You Start
Getting the right tools together before you start saves you the mid-job hardware-store run.
For any wheel bearing job:
- Floor jack and at least two quality jack stands
- Breaker bar (the axle nut on front hubs is typically torqued to 150–250 ft-lbs — don't try it with a standard ratchet)
- Torque wrench (1/2" drive)
- Full metric and SAE socket set
- Wire brush and penetrating oil (for rusty bolts — plan on soaking them the night before)
- Rubber mallet
Additional tools for press-fit bearings:
- Hydraulic bearing press
- Snap-ring pliers
- Hub/bearing puller or slide hammer
- Brass punch
If you don't own a press and don't want to rent one, a bolt-on hub assembly job is the realistic DIY path. Pressed bearings without the right equipment turn into hours of frustration and potentially a damaged knuckle.
Step-by-Step: How to Replace a Bolt-On Wheel Hub Assembly
This covers the most common DIY scenario — a front or rear hub assembly on a modern passenger car.
Step 1: Loosen the Axle Nut First (Front Wheels Only)
With the wheel still on the ground, pop the center cap and break the axle nut loose. This nut is torqued extremely tight. Apply penetrating oil if there's any rust. Do this *before* you jack the car up — the ground keeps the wheel from spinning.
Step 2: Lift the Vehicle and Secure It
Jack up the vehicle at the manufacturer's specified lift point and place jack stands under the frame. Never work under a car supported only by a floor jack. Remove the wheel.
Step 3: Remove the Brake Components
Unbolt and remove the brake caliper — don't let it hang by the brake hose. Use a wire or bungee cord to support it from the spring. Slide off the brake rotor. If the rotor is stuck, a couple of firm raps with a rubber mallet on the hat area usually frees it.
Step 4: Disconnect the Wheel Speed Sensor
If the sensor wire connects to the old hub, unplug it carefully. These clips are often brittle on older vehicles — work slowly.
Step 5: Remove the Old Hub Assembly
There are typically three or four bolts securing the hub assembly to the steering knuckle. These are often rusty and stubborn. Soak them well and use a 6-point socket — never a 12-point on a stuck fastener. Once the bolts are out, work the hub free from the knuckle. If it's stuck, a hub puller makes this step clean and safe.
Step 6: Clean the Knuckle Mating Surface
Use a wire brush to clean the bore in the knuckle. Any debris here will prevent the new hub from seating correctly and can cause premature failure.
Step 7: Install the New Hub Assembly
Seat the new hub into the knuckle and thread the bolts in by hand first. Torque them to the manufacturer's specification — typically 65–110 ft-lbs depending on the vehicle. Reconnect the speed sensor.
Step 8: Reinstall Brakes, Wheel, and Axle Nut
Reinstall the rotor, caliper, and wheel. Lower the vehicle enough to keep the wheel from spinning, then torque the axle nut to spec (check your service manual — it varies widely by vehicle). Use a new cotter pin or stake the nut as specified.
Step 9: Test Drive and Re-Torque
Take a slow test drive in a parking lot first, listening for any new noises. Then drive normally. Re-check lug nut torque after 50–100 miles — wheels can settle slightly.
When to Skip the DIY and Call a Shop
Be honest with yourself here. Call a shop if:
- Your vehicle has a pressed bearing (not a bolt-on hub) and you don't have access to a press
- The knuckle or spindle shows visible damage
- You're not comfortable torquing safety-critical fasteners correctly
- Any suspension or steering components are damaged in the process
NHTSA data consistently links wheel end failures to crashes and rollovers. A proper torque spec isn't optional.
My honest take: for a bolt-on hub assembly on a front-wheel-drive car, this is one of the better bang-for-your-buck DIY jobs out there. You'll save $200–$400 in labor on a repair that really isn't complicated if you have the right tools and take your time. That said, pressed bearings are a different animal — renting a press and doing it wrong can ruin the knuckle, turning a $100 bearing job into a $600 knuckle replacement. Know your limits.
Sources
Find the right part for your vehicle
Guaranteed fit, ships free
FAQ / People Also Ask
It depends on whether your vehicle uses a press-fit bearing or a bolt-on hub assembly. Bolt-on hub assemblies are a legitimate DIY job for a weekend mechanic with basic tools. Press-fit bearings require a hydraulic press and are better left to a shop unless you have access to one.

Comments
Loading comments...
Comments are moderated by the AutoBuffy team.